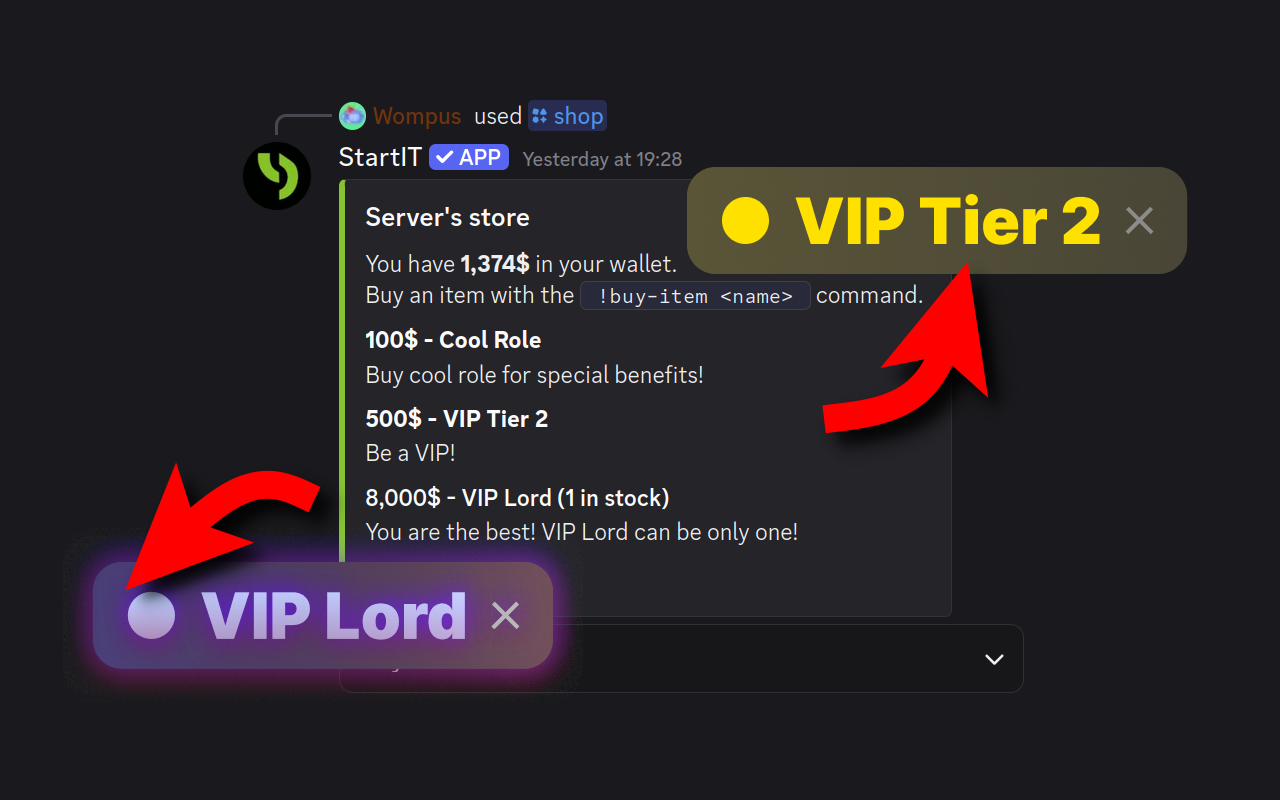
Use the bot command /shop to trade virtual currency for Discord roles
If your server's economy is just numbers on a screen, people will eventually stop caring. To keep them active, you need to let them turn those digits into exclusive roles so they have a real reason to earn.
ATTENTION
This guide assumes you already have the StartIT bot on your server.
If you’re getting started, check out our initial setup guide first.
In the world of Discord servers, a virtual economy is only as strong as the /shop command. Earning server cash through chatting or games is fun, but without a meaningful way to spend those riches, users eventually lose interest. To keep engagement high and give your members a sense of progression, you need a Server Shop.
In this comprehensive guide, we’ll walk you through setting up store using the StartIT bot, where your members can trade their hard-earned currency for the ultimate status symbol: Exclusive Roles.
Design and Create Your Roles
Before configuring the bot, you need the merchandise. These roles will act as rewards, visual badges of honor, or keys to secret channels.
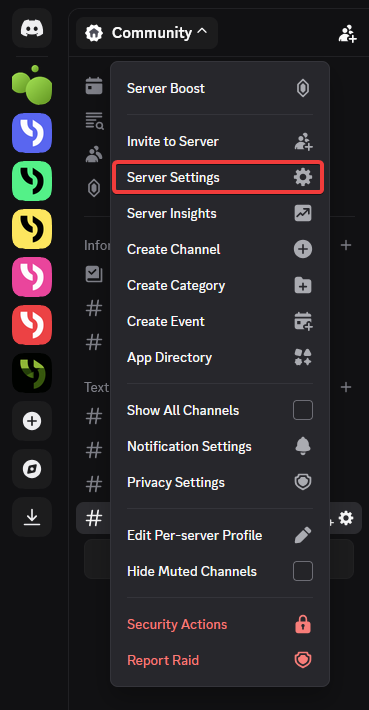
- Open your Discord server and click on the Server Name in the top-left corner to open the dropdown menu.
- Navigate to Server Settings.
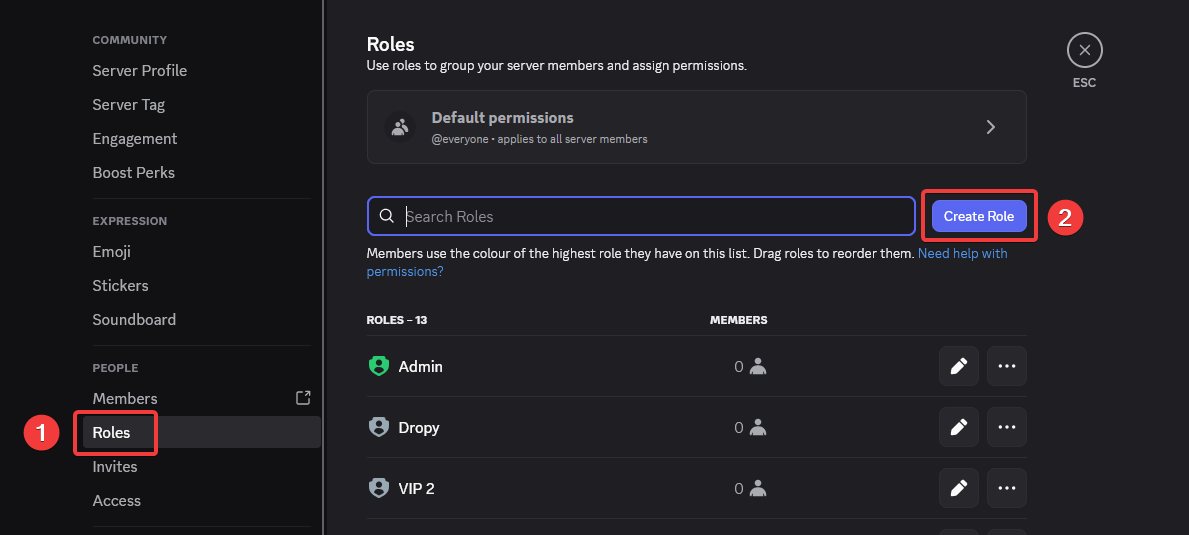
- Select the Roles tab (1) and click the Create Role button (2).
For example:
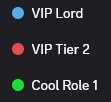
Bronze Member (Cheap, accessible to everyone)
Silver Supporter (Mid-range)
Gold VIP (Expensive, prestigious)
Server Legend (Luxury price, very exclusive)
Give each role a distinct color and ensure they are organized in your server hierarchy.
Transforming Roles into Store Items
Now that your roles exist on Discord, it’s time to list them in the StartIT shop. To do that, head over to the startit.bot dashboard and log in.
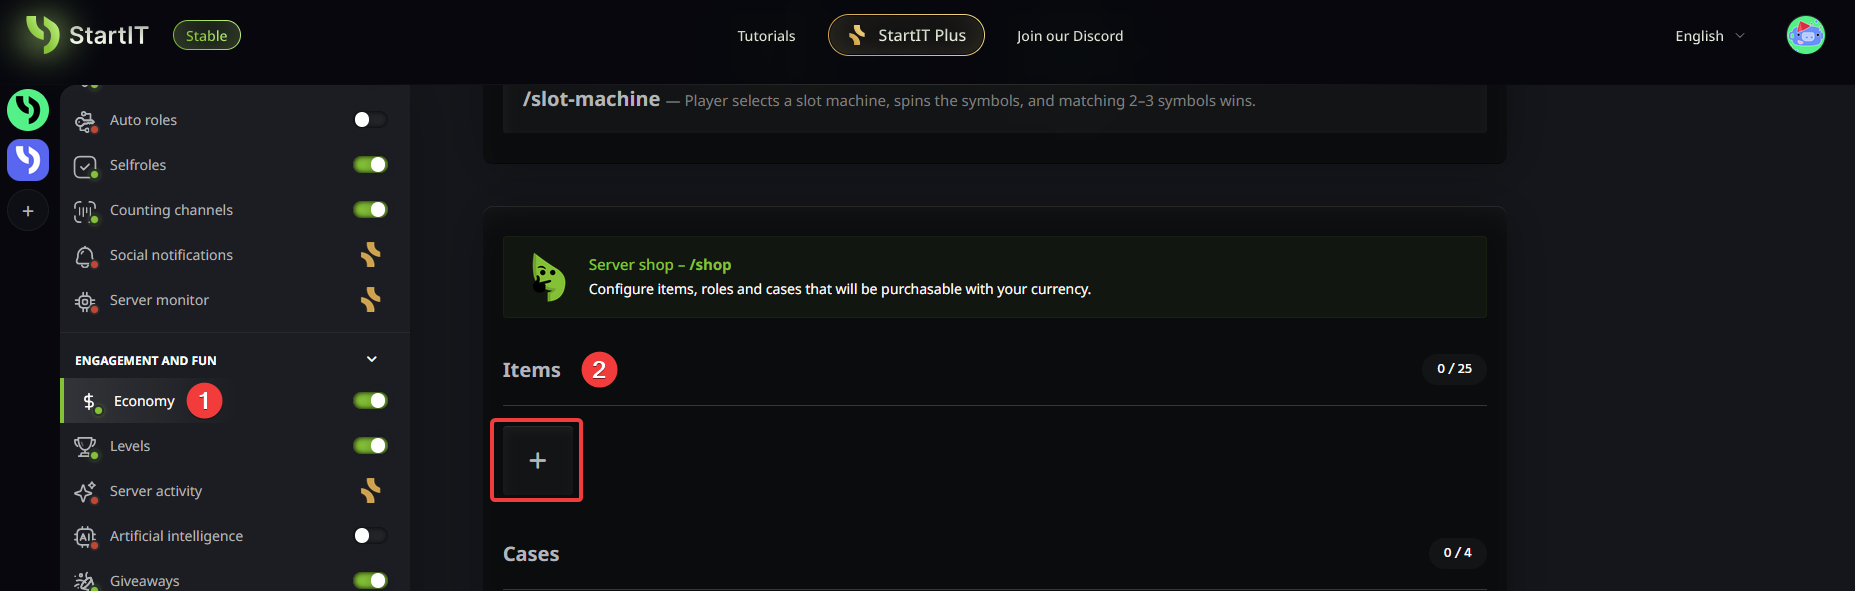
- Next, navigate to the Economy plugin.
- Scroll down until you find the Items section and click the "+" icon to add a new product.
Basic Configuration
In the item creation panel, focus on these three essentials:
- Name (1): Give item a clear name (matching the Discord role is usually best).
- Type (2): Set this to Instant Action. This ensures the role is granted the moment the transaction is confirmed.
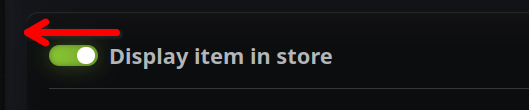
- Visibility (3): Ensure Display item in store is toggled ON.

Customizing the Store Appearance
This is where you can get creative with your economy's balance:
- Description (1): This is your sales pitch. It appears directly in the store listing, so be explicit about what the user is getting. Does the role grant access to a VIP lounge? Does it allow image perms in general chat? List the perks here so users know exactly why they are saving up.
- Price (2): Set a cost that matches the role's prestige. For a balanced economy, we recommend making the progression roles increasingly expensive to reward long-term activity.
- Stock Limits (3): When you set a stock limit, the counter decrements with every purchase. Once it hits 0, the item remains visible in the shop but is marked as Out of Stock. You’ll need to manually refill the stock in the dashboard to make it available again.
#announcements channel to notify the server when limited edition roles are back in stock. Members will rush to the shop to snag one before they’re gone again!
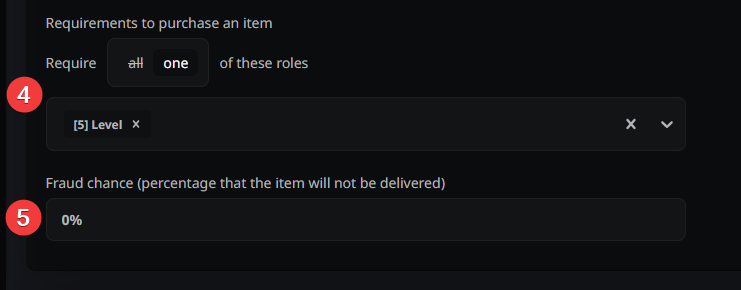
- Requirements (4): Use these to create a clear Progression Line. You can prevent users from skipping tiers; for example, requiring a user to own the Silver role before they are allowed to buy Gold. This ensures a fair journey and keeps high-tier roles exclusive to dedicated veterans. It’s a good habit to list these requirements in the item description so users aren't confused when they can't click Buy.
- Fraud Chance (5): This is perfect for a Black Market feeling. You can list the same role twice: one Legal version (100% success, high price) and one Shady version (cheaper, but with a fraud chance). If the fraud triggers, the money is consumed, but the role is not granted.
The bot keeps the exact fraud percentage hidden from users. You can manually hint at the risk in the description (e.g., Proceed with caution; high risk of being scammed!), or keep them guessing!
Setting Up the Purchase Action
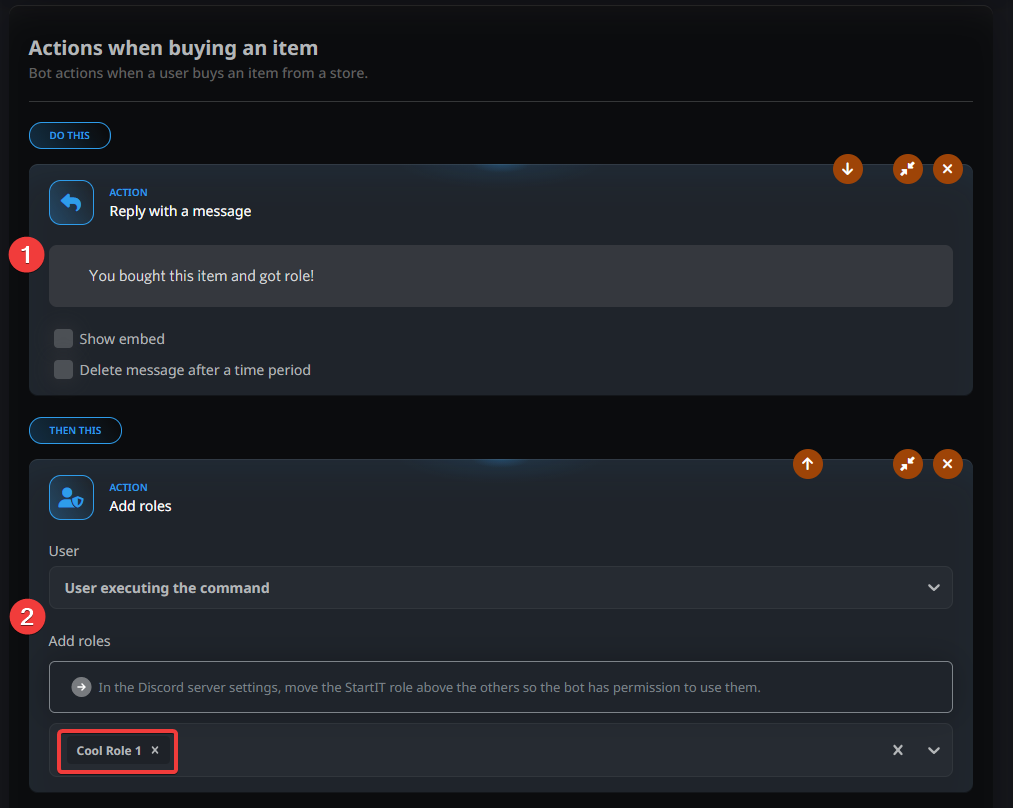
You need to tell the bot exactly what to do once the Buy button is clicked.
- Confirmation Message (1): Customize the message the user receives upon a successful purchase.
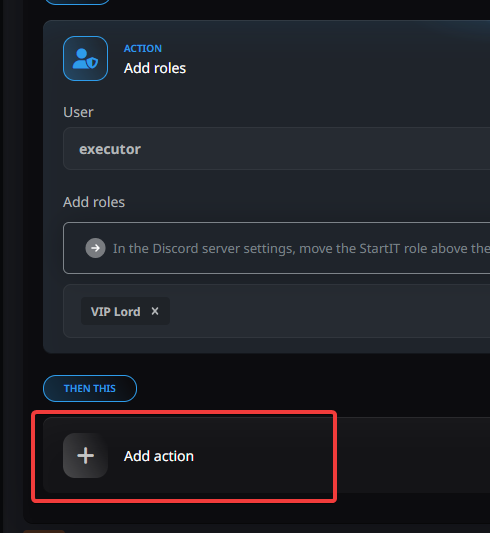
- Add Role Action (2): This is the most crucial part. Add a block to Add Role and select the specific role (e.g., Cool role) from the dropdown menu.
Finishing up
Don't forget to hit Save Changes at the bottom of the page when you're finished!

After everything is ready, head back to your Discord server and type: /shop
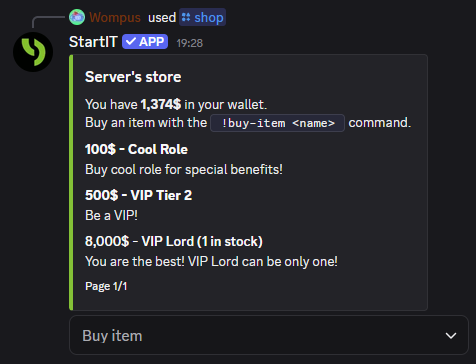
Your new marketplace will appear as a sleek embed, showcasing all available items, their prices, and descriptions. Your users can now start browsing and spending with /buy + role name or with the dropdown menu.
Creative Shop Ideas
While roles are the most popular rewards, they are just the tip of the iceberg. To keep your economy fresh and exciting, you should offer diverse rewards that impact how users interact with your community.
Using the Instant Action and Temporary Role settings, you can stock your shop with unique digital products that provide immediate value.
- Exclusive Channel Access: Use the shop to sell access to hidden parts of your server. Whether it’s a Secret Memes vault, a high-level chat for veterans, or a VIP-only media channel, selling access keys is a great way to reward your most active users.
- Custom Nicknames: One of the most popular fun items; sell the right to have a unique nickname. Users love the ability to stand out, and it adds a layer of humor and personality to your server's chat history.
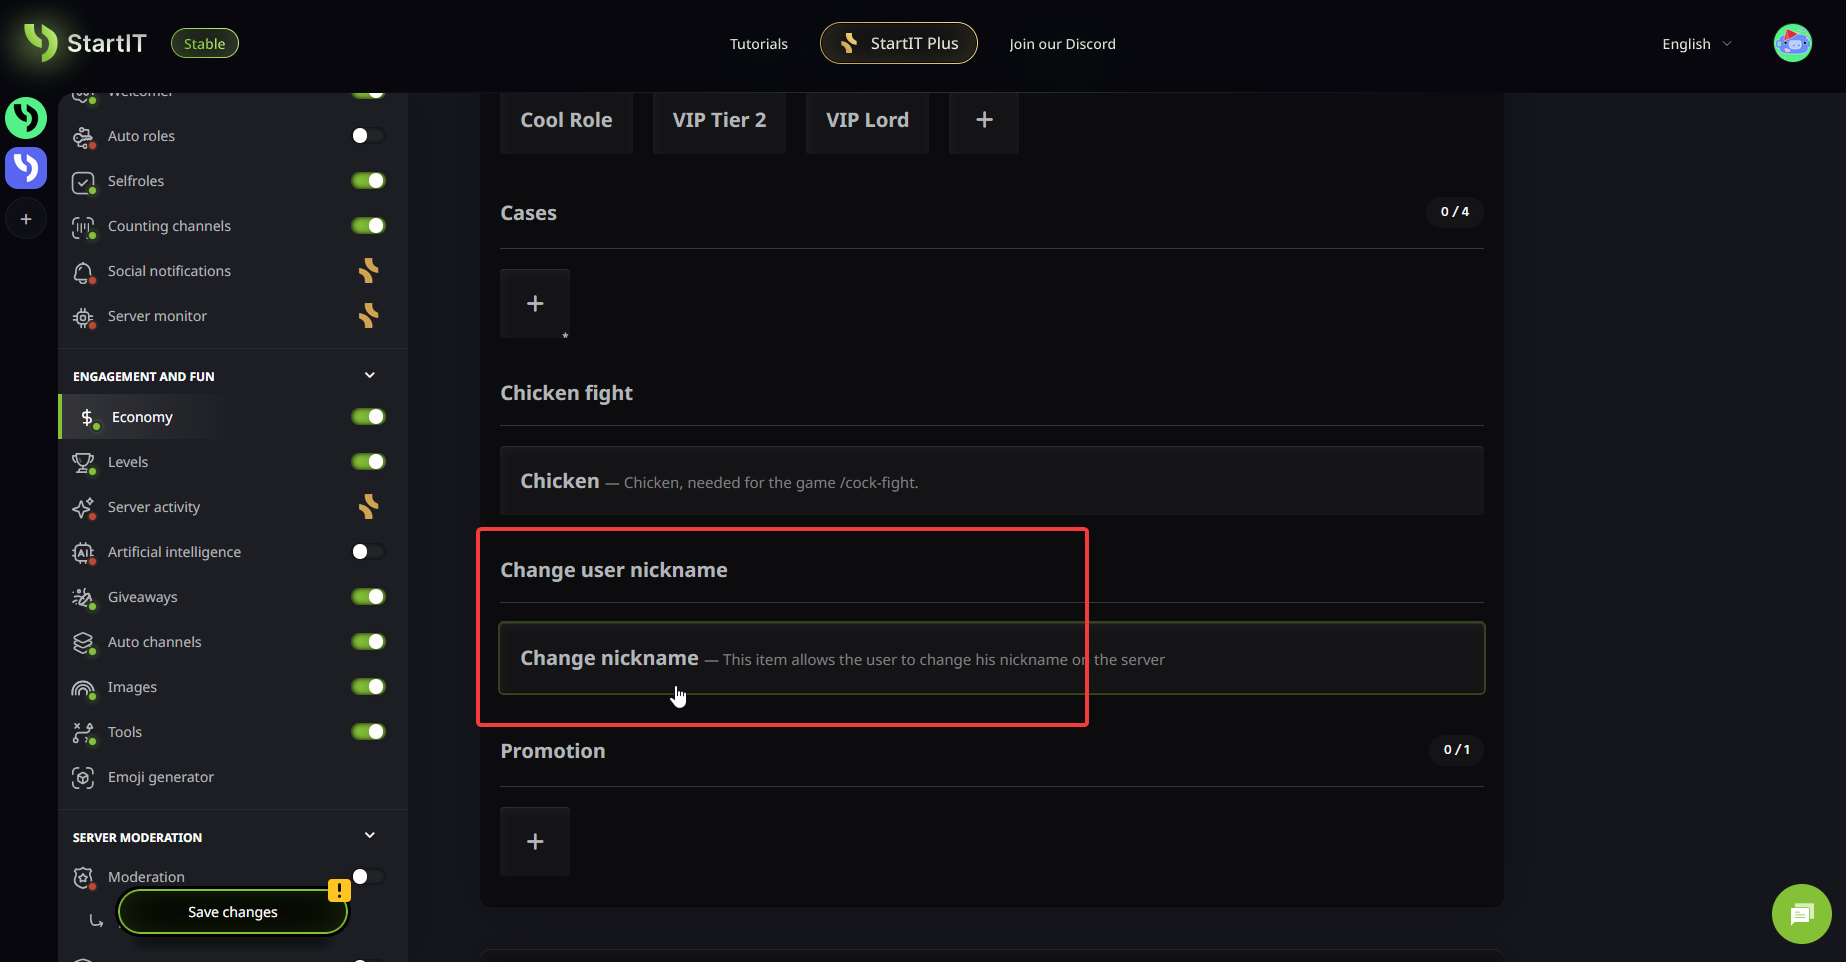
Find the Change Nickname feature in your Economy settings and toggle it on. A new item will automatically appear in your /shop. When a user purchases it, a prompt will appear allowing them to type in their desired nickname. The bot handles the rest instantly!
- XP Multipliers: Connect your economy with leveling system by selling XP Boosts. It's simple, just sell special roles that are granting users a multiplier on their XP gains. If you utilize StartIT leveling, you may want to check out our guide on how to grant bonus XP to specific roles.
- Selling Manual & Real-World Rewards: You can even use the shop to sell items that require human intervention, like autographs, physical merchandise, or custom services. Create an item and use the Send Message to Channel action to alert a private admin channel whenever the item is bought.
Community Tip: Try rotating these items weekly. Adding limited-time boosters or fun perks ensures that users check the /shop every day to see what’s new!
Further reading
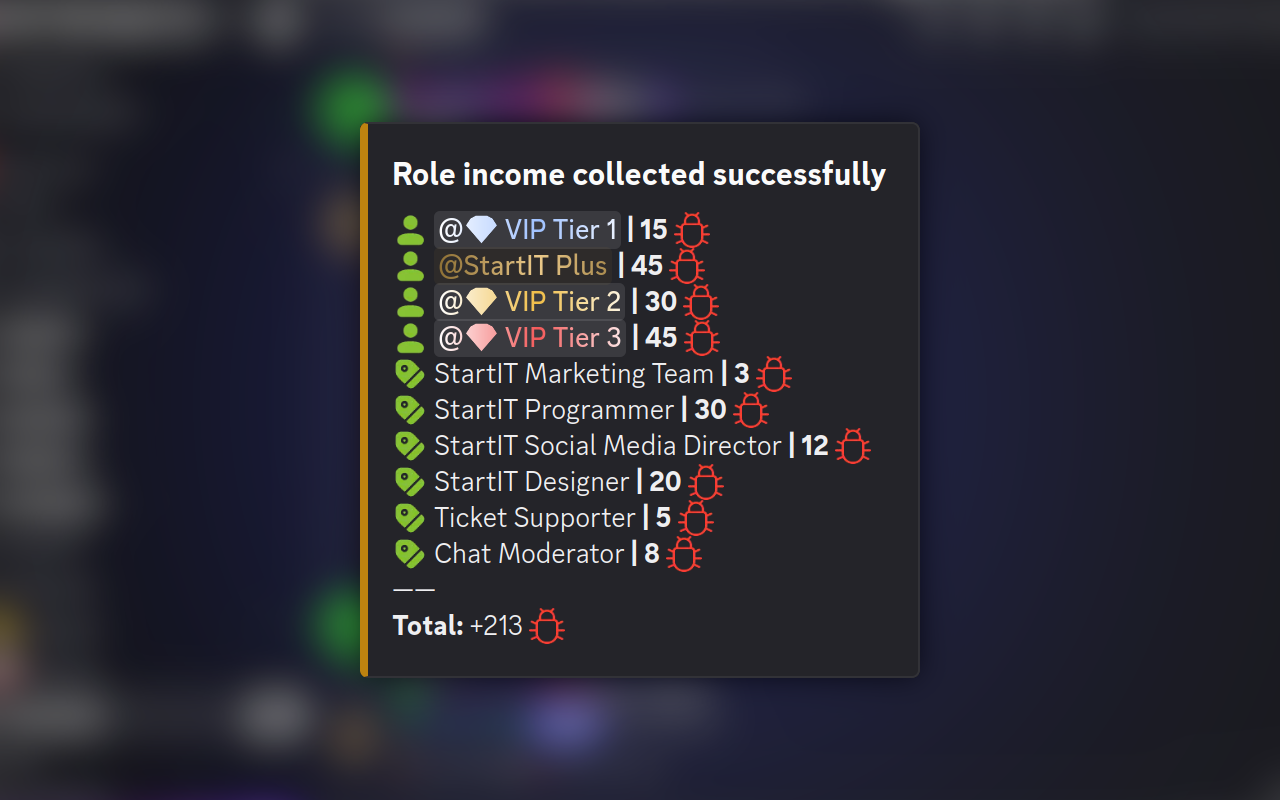
If your members are grinding just to change their username color, they'll eventually burn out and leave. By setting up a /collect-income system, you turn those stagnant roles into active gold mines. Imagine your users logging in every morning with a purpose; not just to chat, but to claim their daily salary and grow their digital bank account. Whether it’s a high-tier "Executive" role that drops a massive daily bonus or a "Street Performer" profession that grants a few coins, you’re giving people a reason to stay invested.
Common Problems
An item is in the shop, but it doesn't appear in the purchase dropdown
The bot is smart; it hides items that the user cannot afford. If a user doesn't have enough balance, they won't see that item as an option to buy.
The bot says I bought the role, but I don't actually have it
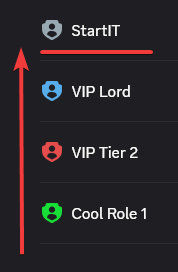
This is almost always a Hierarchy Issue. In Discord's role settings, a bot can only manage roles that are below its own highest role.
Solution: Go to Server Settings > Roles and drag the StartIT role to the top of the list (or at least above the roles it is supposed to sell).
Common questions about the configuration
How to make up prices?
To keep your economy healthy, follow the 10:1 Ratio rule: the most expensive item should take roughly 10 times longer to earn than the cheapest item.
- Drain the Gold: Regularly introduce money sinks; items that are expensive but temporary (like a 24-hour colored name).
- Dynamic Pricing: If you notice everyone is rich, manually increase the prices of new stock to reflect the current wealth of the server.
Can I set up an public announcement that triggers every time someone buys a high-tier role?
To turn a private purchase into a community milestone, you can configure the bot to announce high-tier acquisitions publicly. This not only rewards the buyer with instant recognition but also fuels a healthy sense of competition among other members.
In the item configuration panel, navigate to the Actions section and click Add Action.
From the list of available triggers, select Send message to channel.
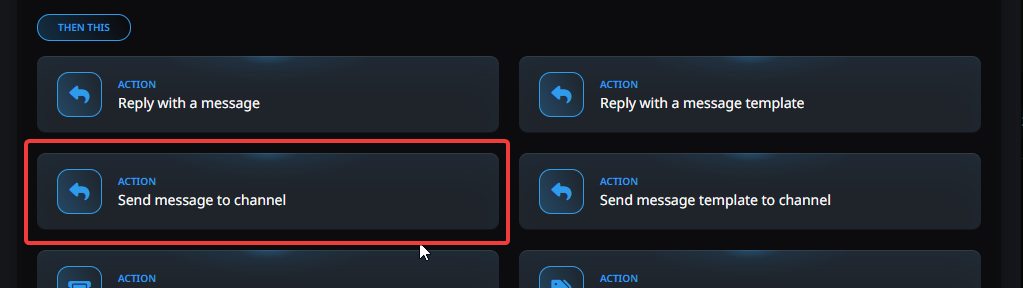
Customize the Announcement: Select your desired public channel (e.g., #lounge or #announcements) and craft a custom message.
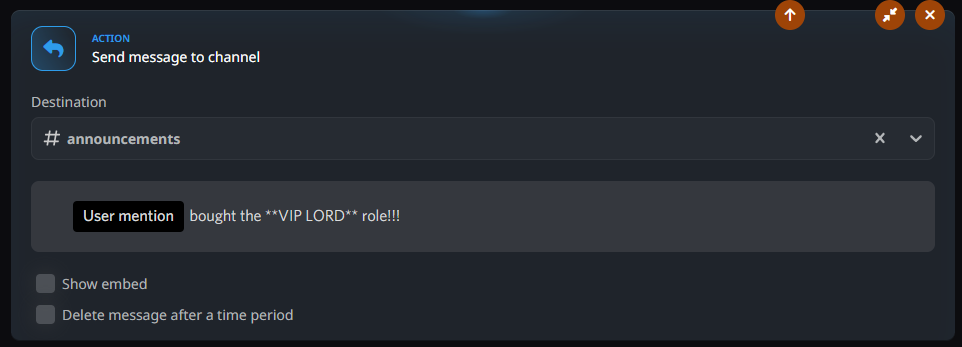
Publicly validating a user's wealth turns a simple transaction into a server-wide event. When others see a VIP Lord announcement, it creates an aspirational goal, encouraging everyone to stay active and keep earning!
Can I buy multiple items at once?
Currently, transactions are processed individually to ensure the bot correctly triggers the unique Instant Actions (like role assignment) for each specific item. This prevents errors and ensures your inventory stays accurate!
This may be outdated at the time of reading, as we update bot regularly.
Can I make users pay every month to keep their role?
While StartIT doesn’t have a traditional recurring billing system that automatically withdraws money, you can easily simulate a monthly subscription by selling Temporary Roles. This forces users to return to your shop every month to renew their status, keeping your economy flowing!
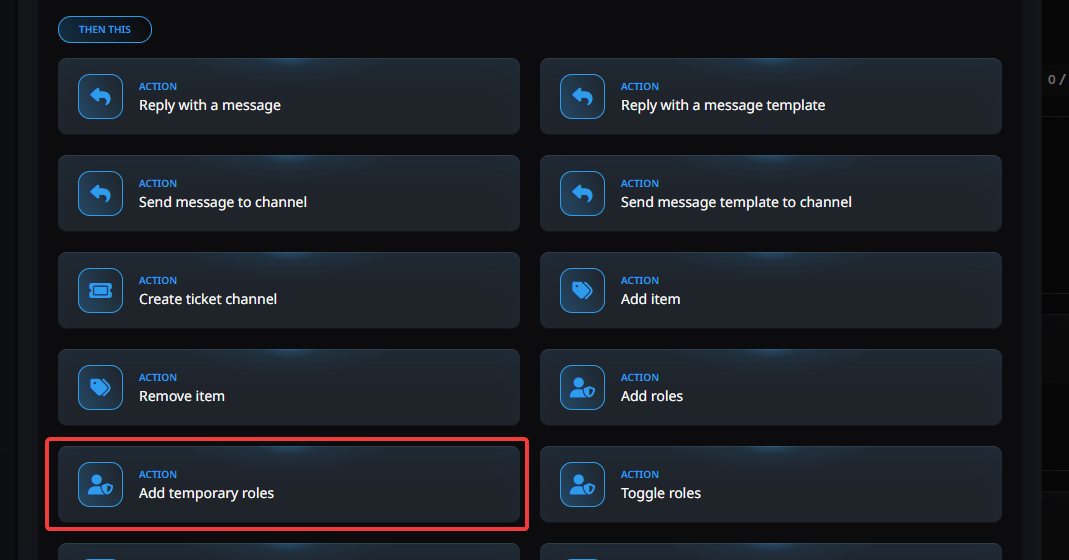
- First, if you have a standard Add Role action, click the "X" button next to it to remove it. You want to replace the permanent reward with a timed one.
- Click Add Action and select Add Temporary Role from the list.
- In the configuration block, select the role you want to grant. Finally, go to the For how long field and enter your desired duration. For a monthly sub, you would set this to 30 days.
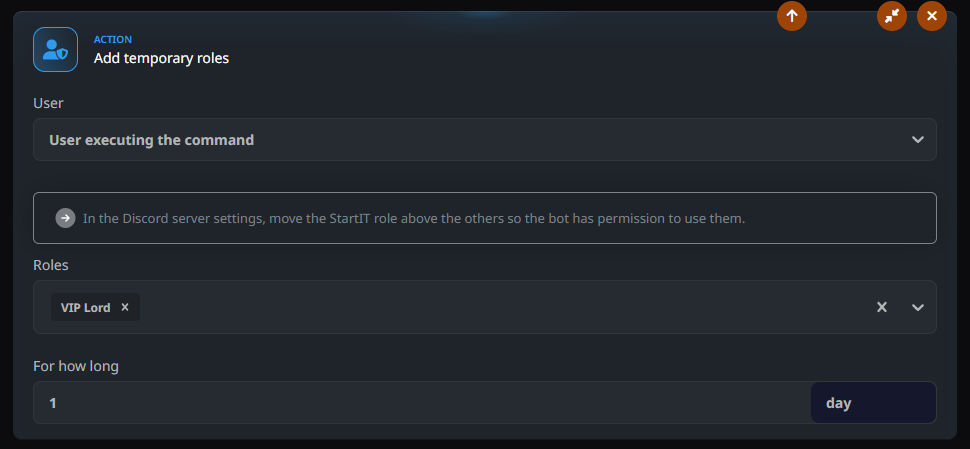
Once the 30 days are up, the bot automatically remove the role from the user. If they want to keep their exclusive perks, badges, or channel access, they’ll have to jump back into the /shop and spend their earned currency again. It’s a perfect way to ensure your members stay active!
How to automatically remove lower-tier roles?
In the Purchase Actions section where you set Add Role, click Add Action and look for the Remove Role block. When someone buys Gold VIP, set the bot to remove Silver Member. This keeps your user’s profile clean and ensures they only hold the highest title they've earned.
How can I offer discounts to my most loyal members?
While you could manually create upgrade items (using Requirements feature), the most professional way to handle this is through the Item Price for Individual Roles module. This feature allows you to change the price of an item dynamically based on what roles the user already possesses.
It’s the perfect way to create a progression path; for example, making the Gold role significantly cheaper for users who have already invested in the Silver tier.
- Open the configuration for your higher-tier role (e.g., Ultra Rare VIP King).
- Locate the field labeled Item price for individual roles.
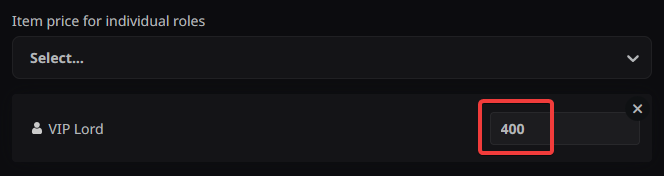
- Select the lower-tier role (the one that grants the discount, e.g., VIP Lord) from the dropdown list.
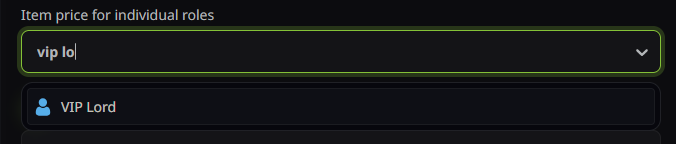
- A popup will appear asking for a new price. Enter the discounted amount that members with that role should pay. Example: If the Ultra Rare VIP King role normally costs 1000 coins, you can set it to 400 coins specifically for VIP Lord members.
This system is completely automated. When a user opens the /shop, the bot checks their current roles and automatically adjusts the price tag for them. It makes the upgrade feel like a personalized reward for their loyalty, rather than just another item on the shelf!
Recommend article to read next