How to Create Reaction Roles on Discord server — Easiest method
Managing a Discord server shouldn't feel like a chore. Let users pick their own interests with a single click. It keeps your channels organized and stops unnecessary notification pings.
Effective user management is the backbone of a thriving Discord community. Every member joins your server with a specific goal in mind—whether they want to stay updated with news, find friends with similar interests, or showcase their hobbies.
To make their experience seamless, you should implement self-assignable roles. These allow users to customize their own profile, while simultaneously making your life easier. By grouping users, you can grant access to specific hidden channels or ping only the people interested in certain updates.
In this guide, we’ll show you how to create an automated panel that lets users pick their roles simply by clicking an emoji reaction under a message.
Add StartIT to Your Discord Server
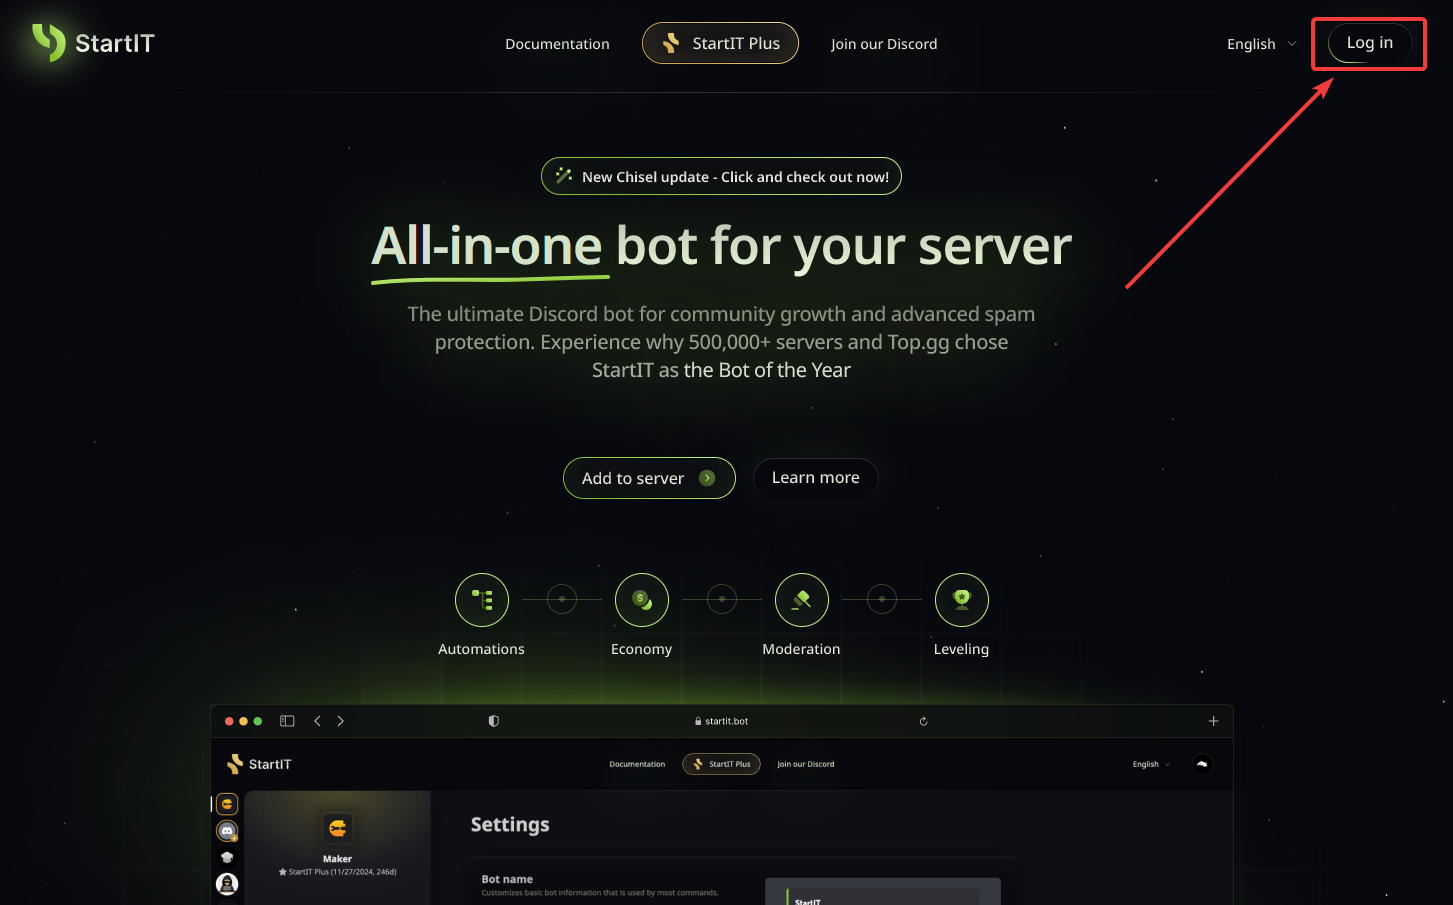
Head over to the website: Visit https://startit.bot/ and log in using your Discord account.
Invite the Bot: Select the server you want to enhance.
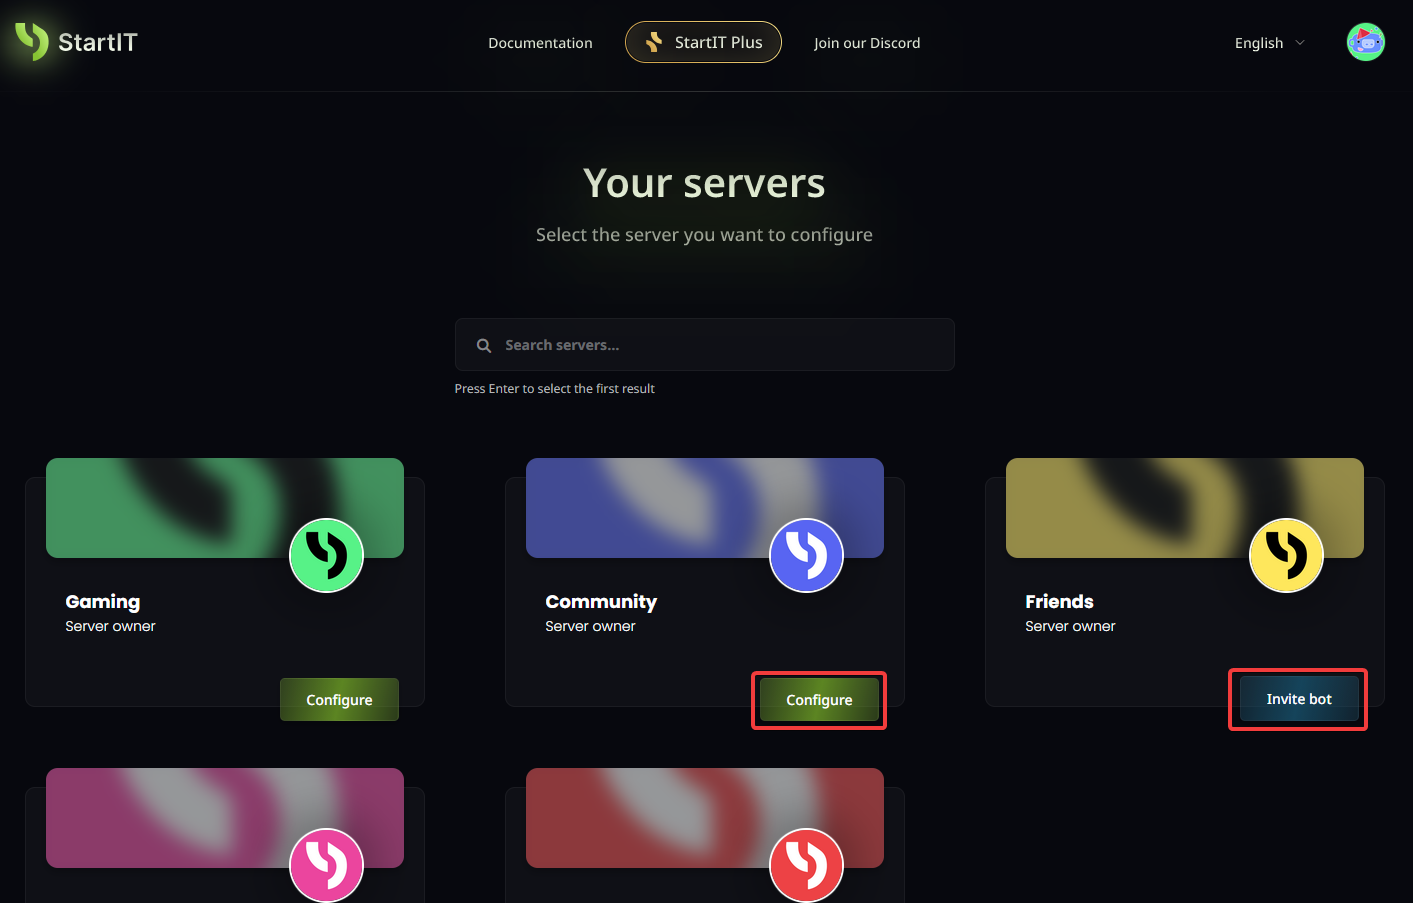
Note: You must have Administrator permissions for the server to appear in the selection list.
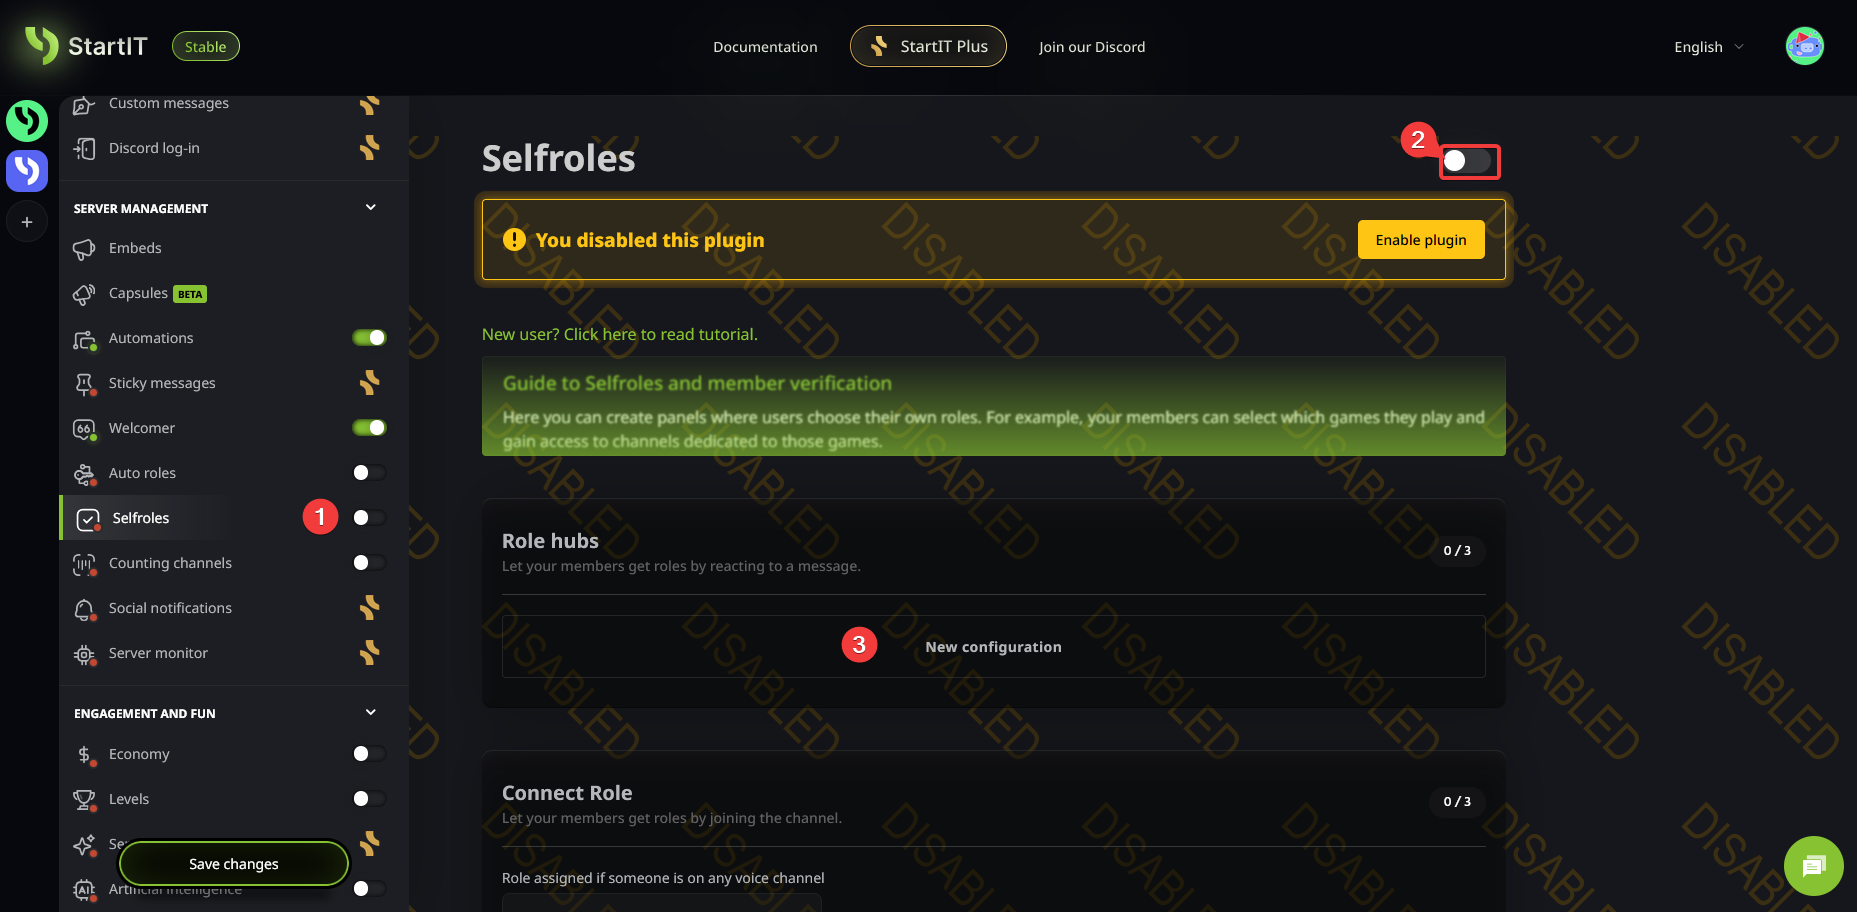
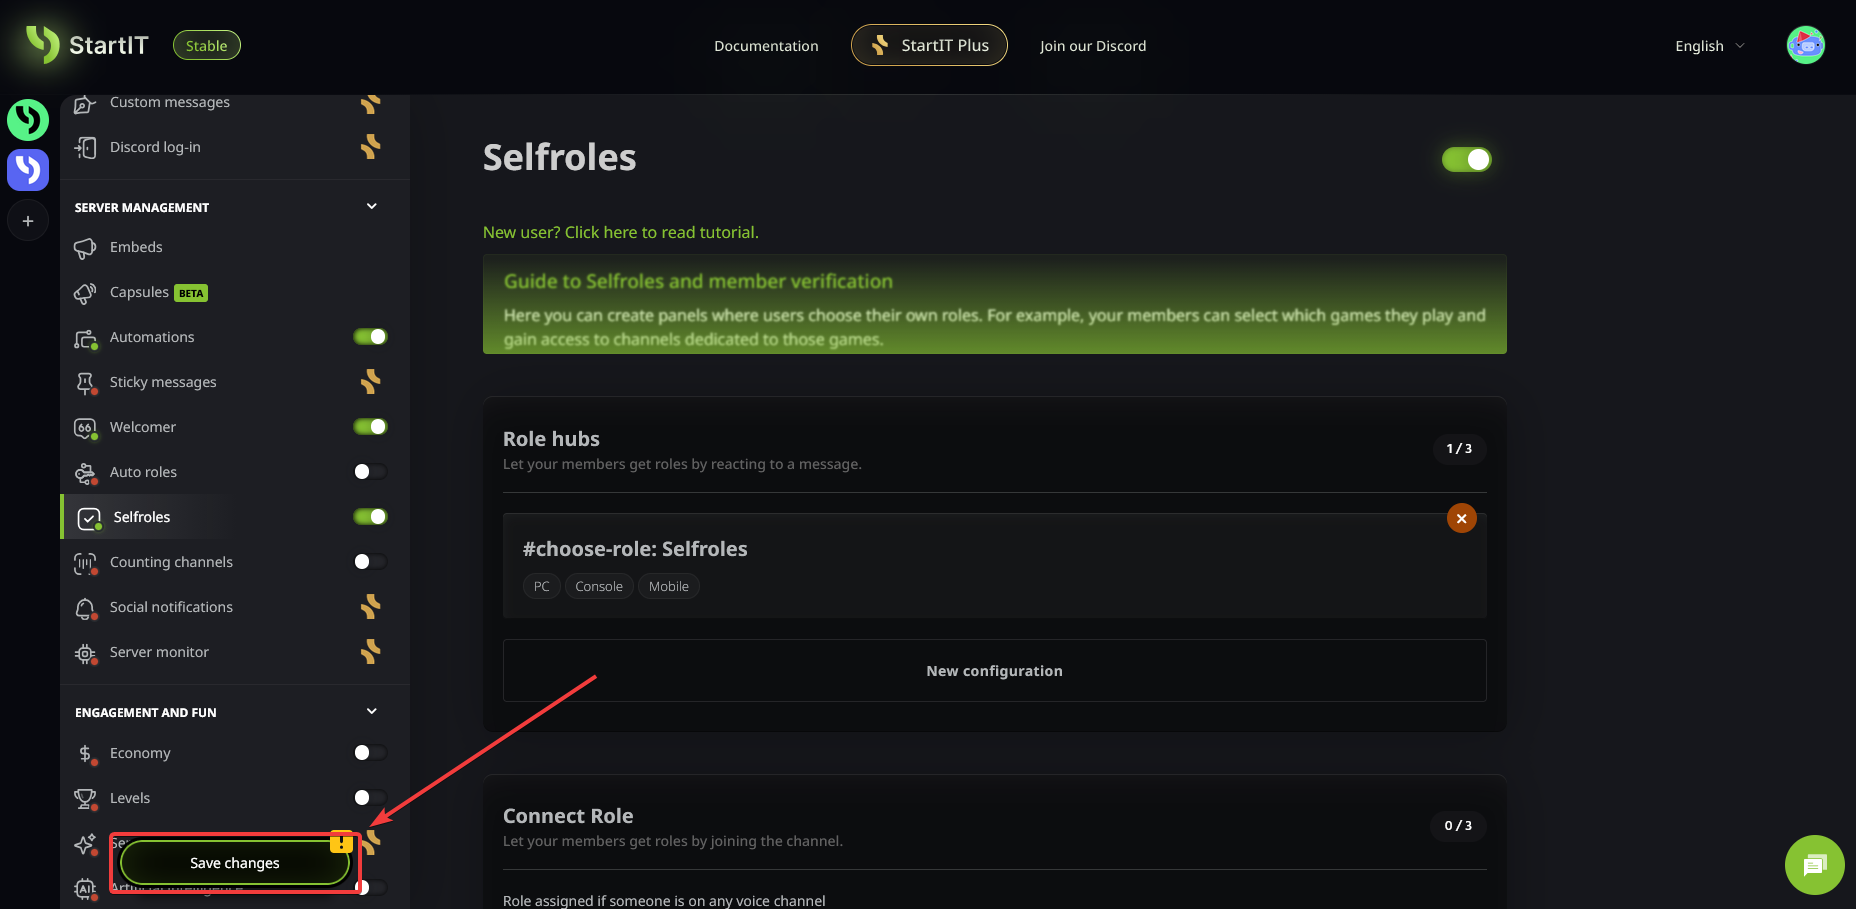
Configure Selfroles plugin
Navigate to the Selfroles plugin, enable it, and click on "New configuration" under the "Role hubs" section.
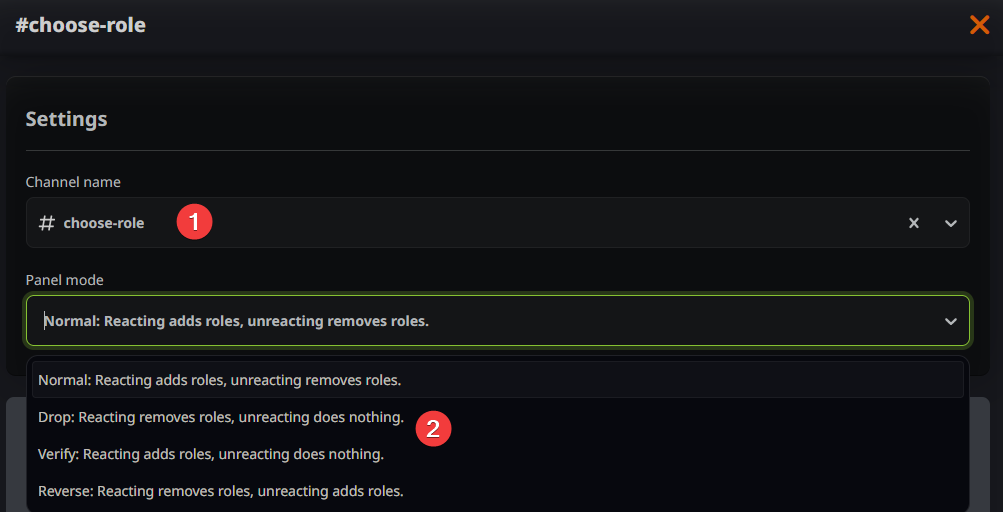
Configure the Channel and Logic
Select the specific channel where you want the role selection panel to appear (1). Then, choose the assignment method from the dropdown list (2) to determine how the roles behave when clicked.
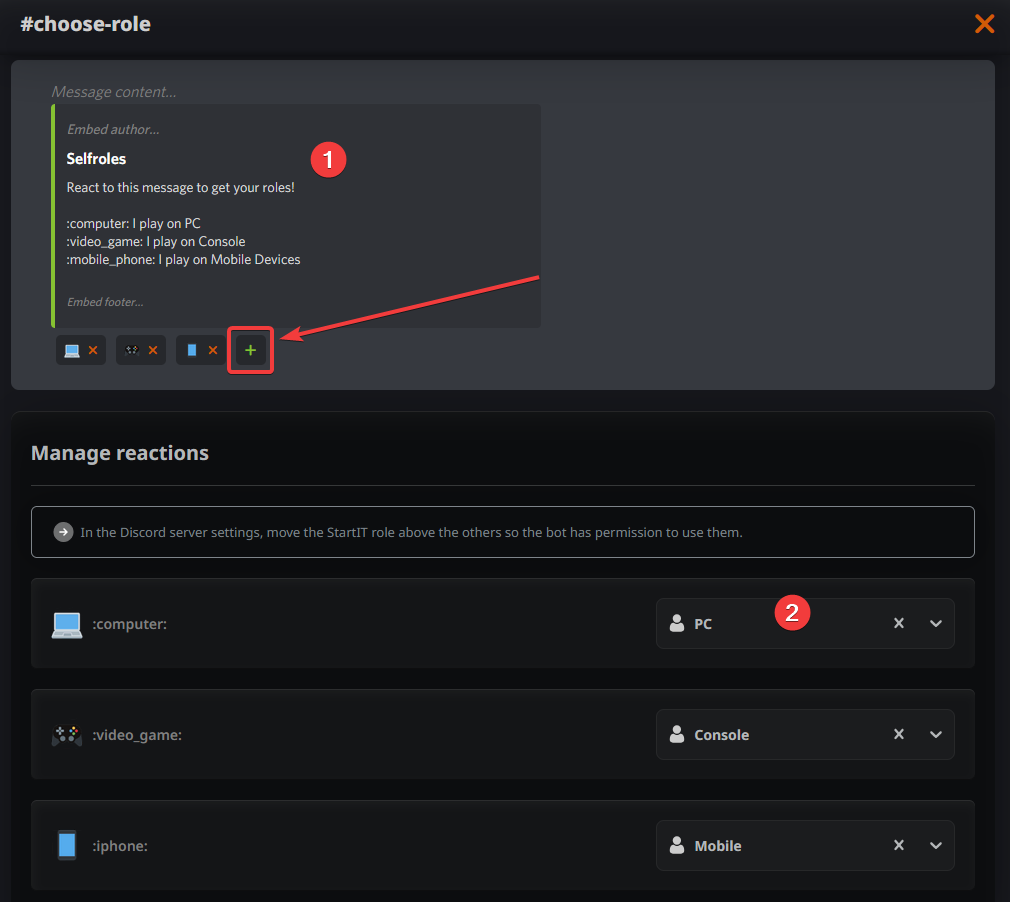
Customize Your Panel
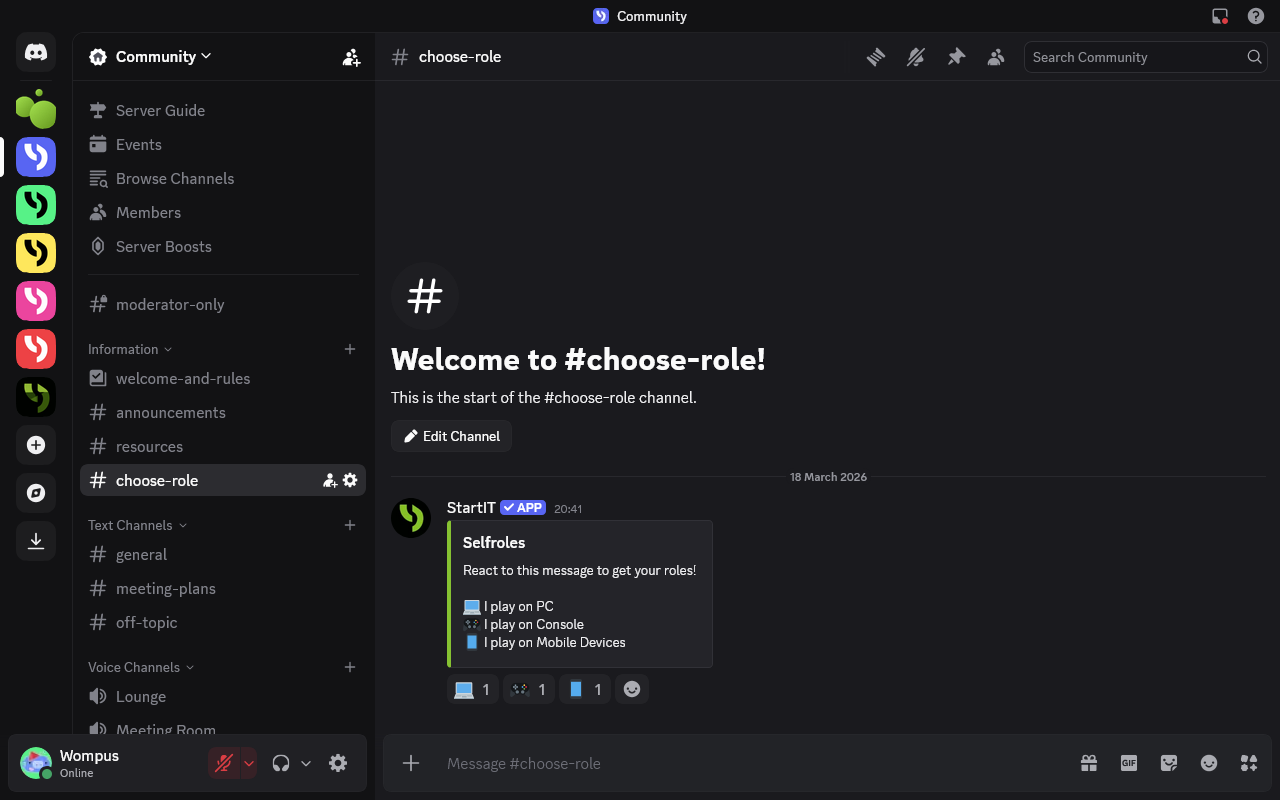
Now, it’s time to design the message. Describe the panel clearly so users know which reaction grants which role. Add your chosen emojis by clicking the "+" button (1). Below that, map each emoji to the corresponding role using the dropdown menus (2).
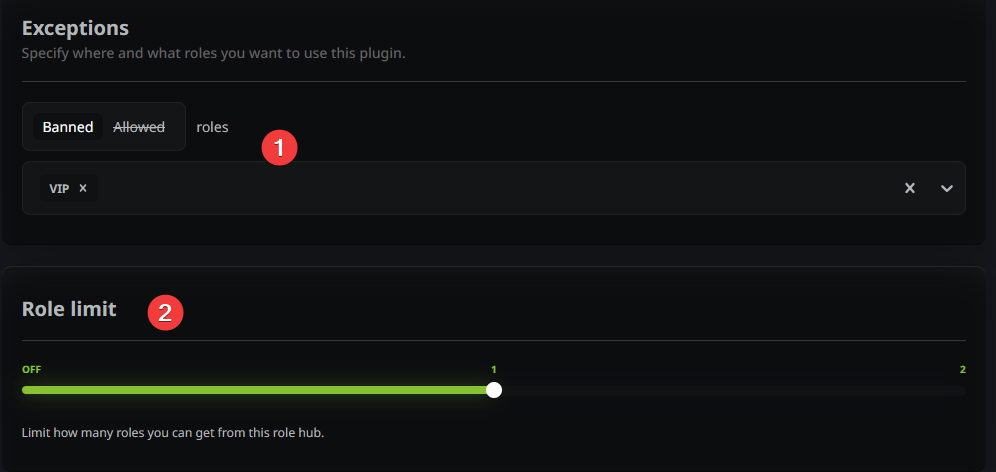
Set Permissions and Limits
You can fine-tune the experience by deciding which roles are allowed (or forbidden) from using this specific panel (1). Additionally, you can limit how many roles a user can pick from this set at once (2).
Save and Launch
Don’t forget to save your changes!
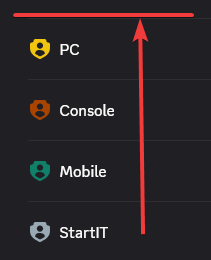
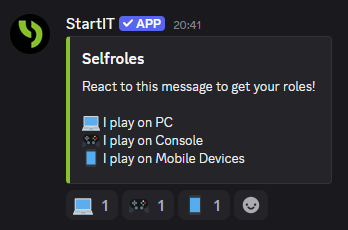
Once saved, the panel will automatically post to your designated channel:
Are you ready to start your first reaction role? Add StartIT bot now and make your community more organized!
Troubleshooting: Common Issues
The panel didn't appear in the channel
- Double-check that you selected the correct channel and hit the "Save" button.
- Ensure the Selfroles plugin is actually toggled to "On."
- Verify the bot’s permissions. It must be able to "View Channel" and "Send Messages" in your chosen location.
The bot isn't assigning the roles
- This is usually a hierarchy issue. Ensure the bot's own role (defaulted to "StartIT") is positioned above the roles it is trying to assign in your Server Settings.