How to Create Auto Voice Channels on Your Discord Server
Stop manually managing a cluttered list of empty voice channels. This guide shows you how to set up dynamic rooms that only exist when someone is actually using them, keeping your server organized and your members' chats private without you lifting a finger.
Discord servers are not just about text communication; voice channels play a vital role in community building. Many active servers experience high traffic in voice chats, yet static channels often remain empty, cluttering the interface and taking up unnecessary space.
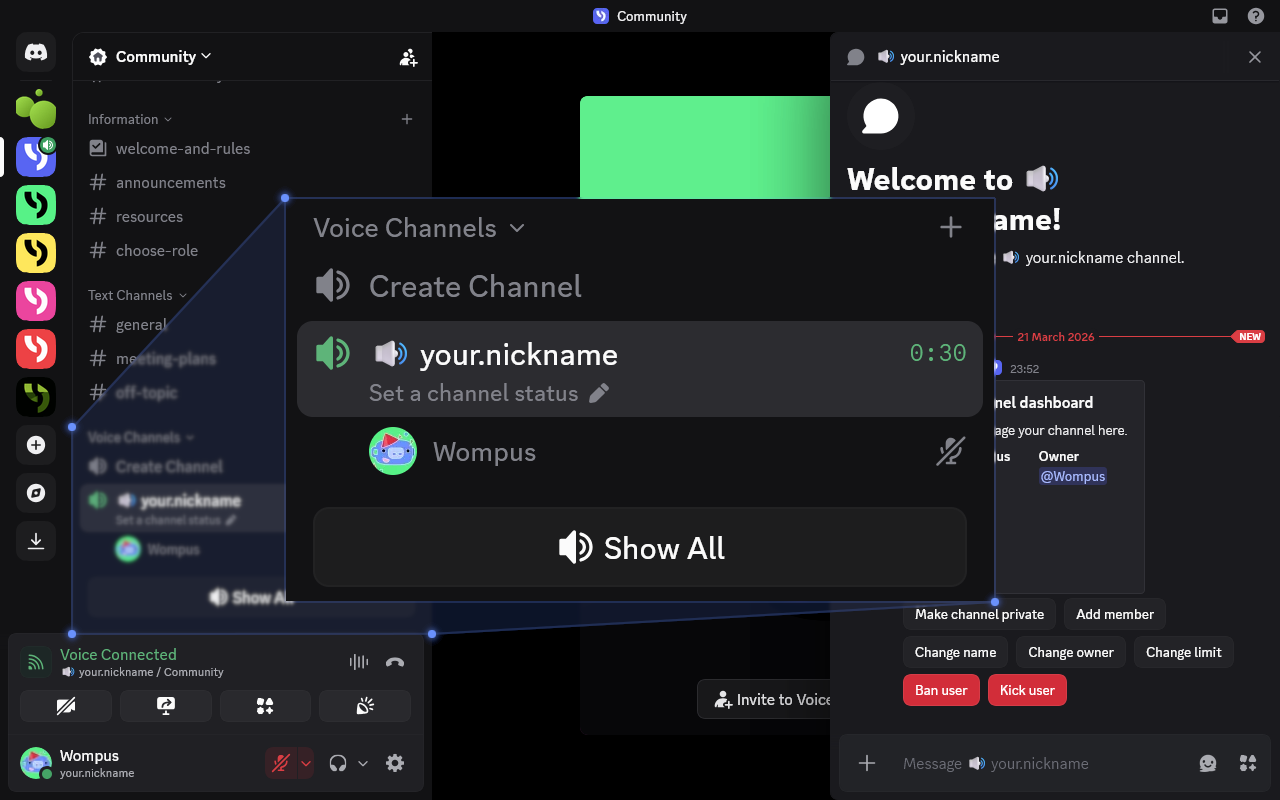
There is a simple and elegant solution to this: Voice Auto Channels. These dynamic channels are created on-demand and automatically delete themselves when the last person leaves. This allows users to create their own private spaces for friends without the fear of uninvited guests interrupting their conversation. In this guide, we will show you how easily you can implement this feature on your server.
Add StartIT to Your Discord Server
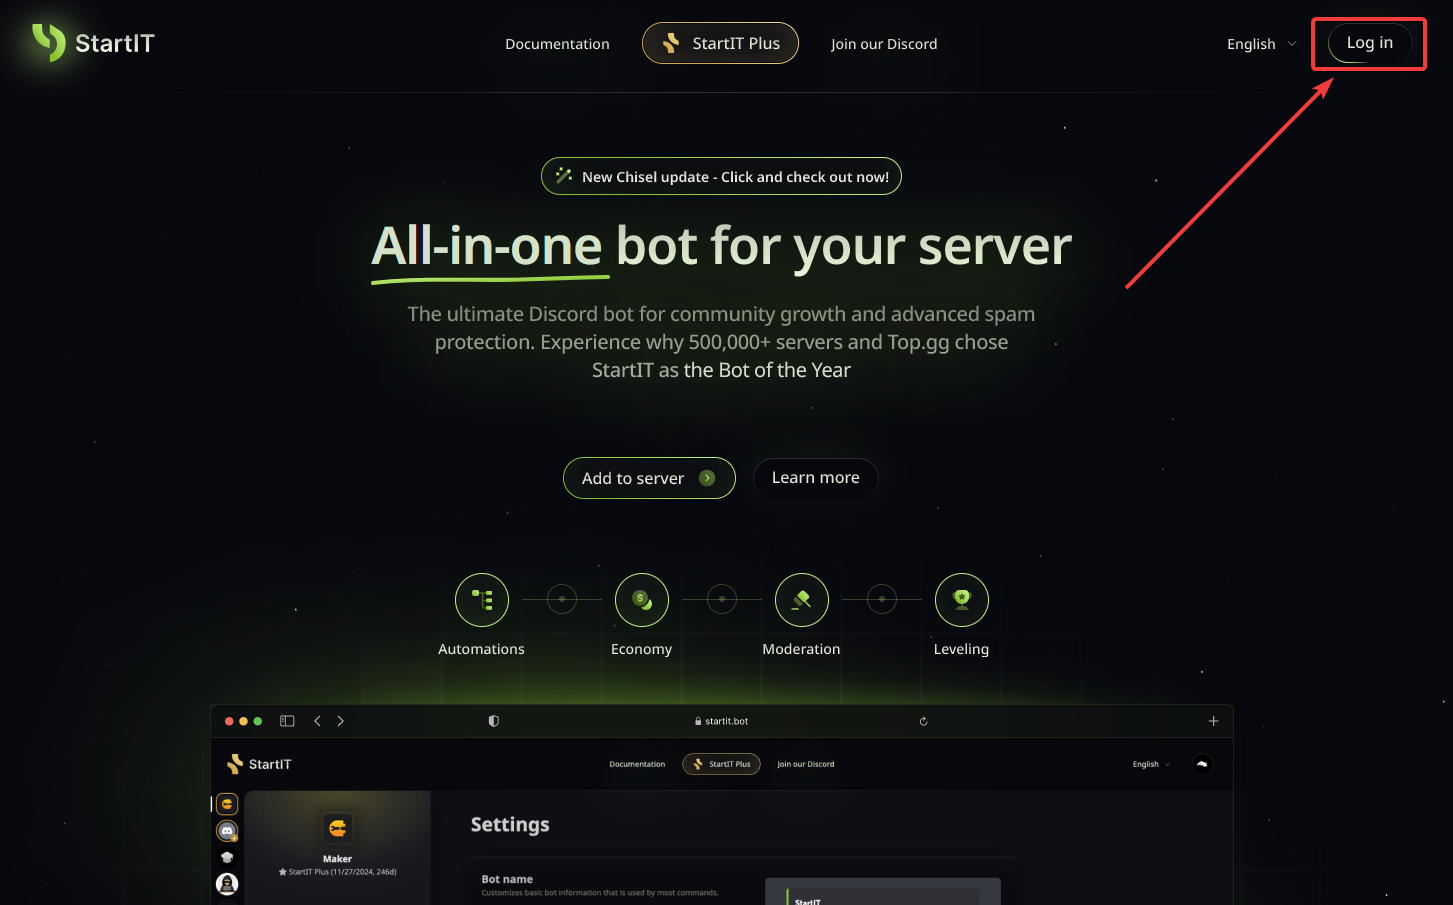
Head over to the website: Visit https://startit.bot/ and log in using your Discord account.
Invite the Bot: Select the server you want to enhance.
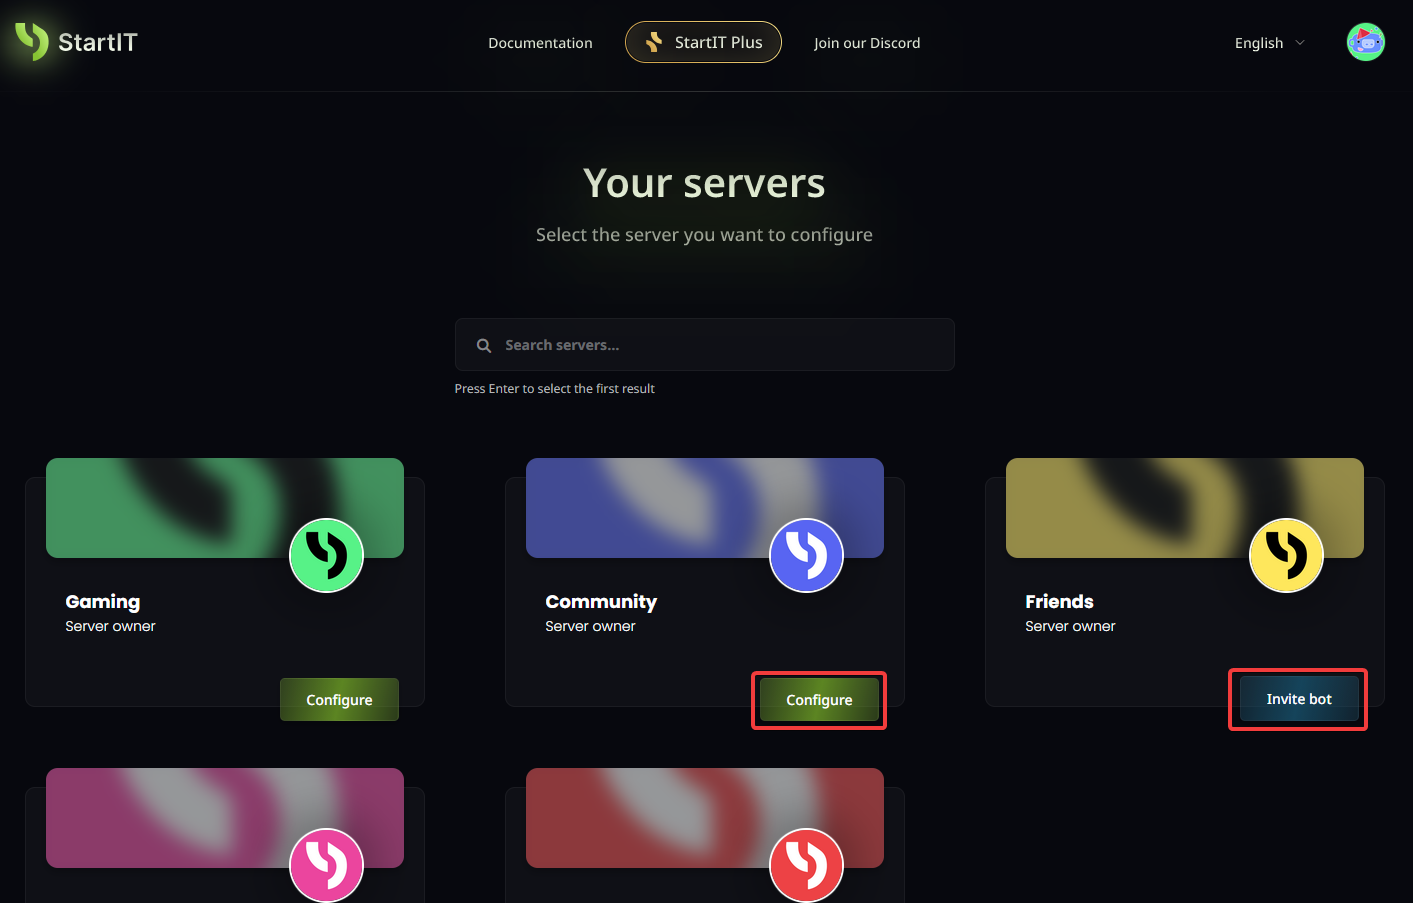
Note: You must have Administrator permissions for the server to appear in the selection list.
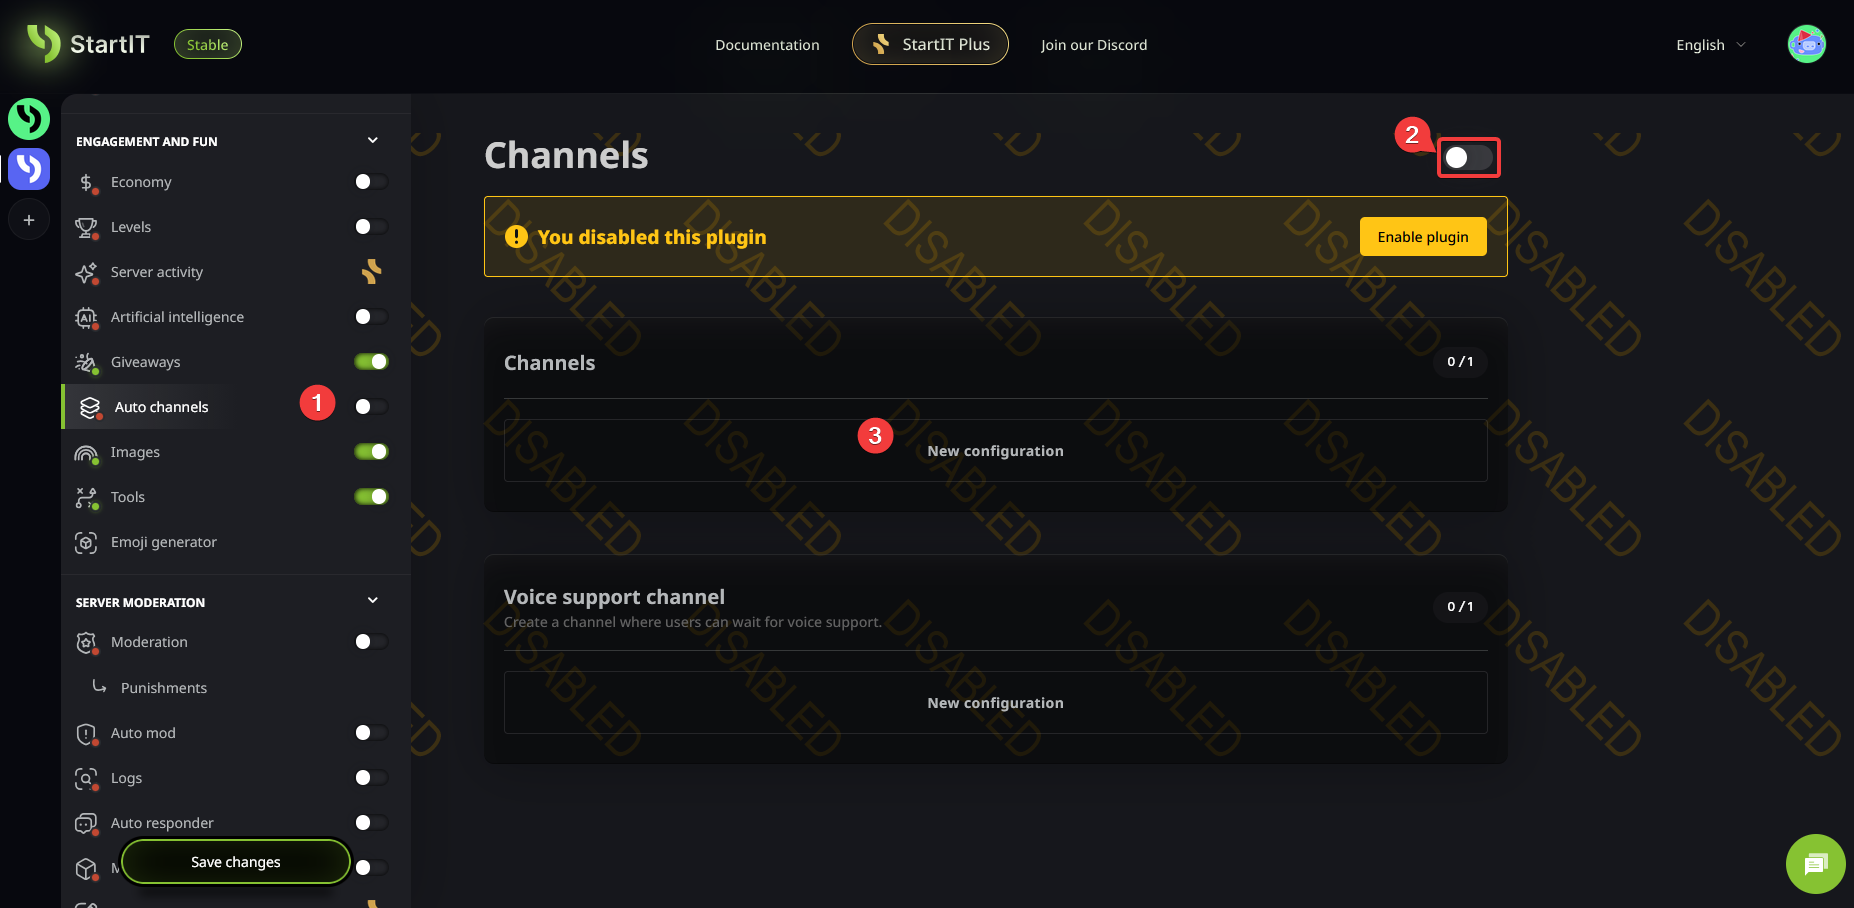
Configure the Auto Channels Plugin
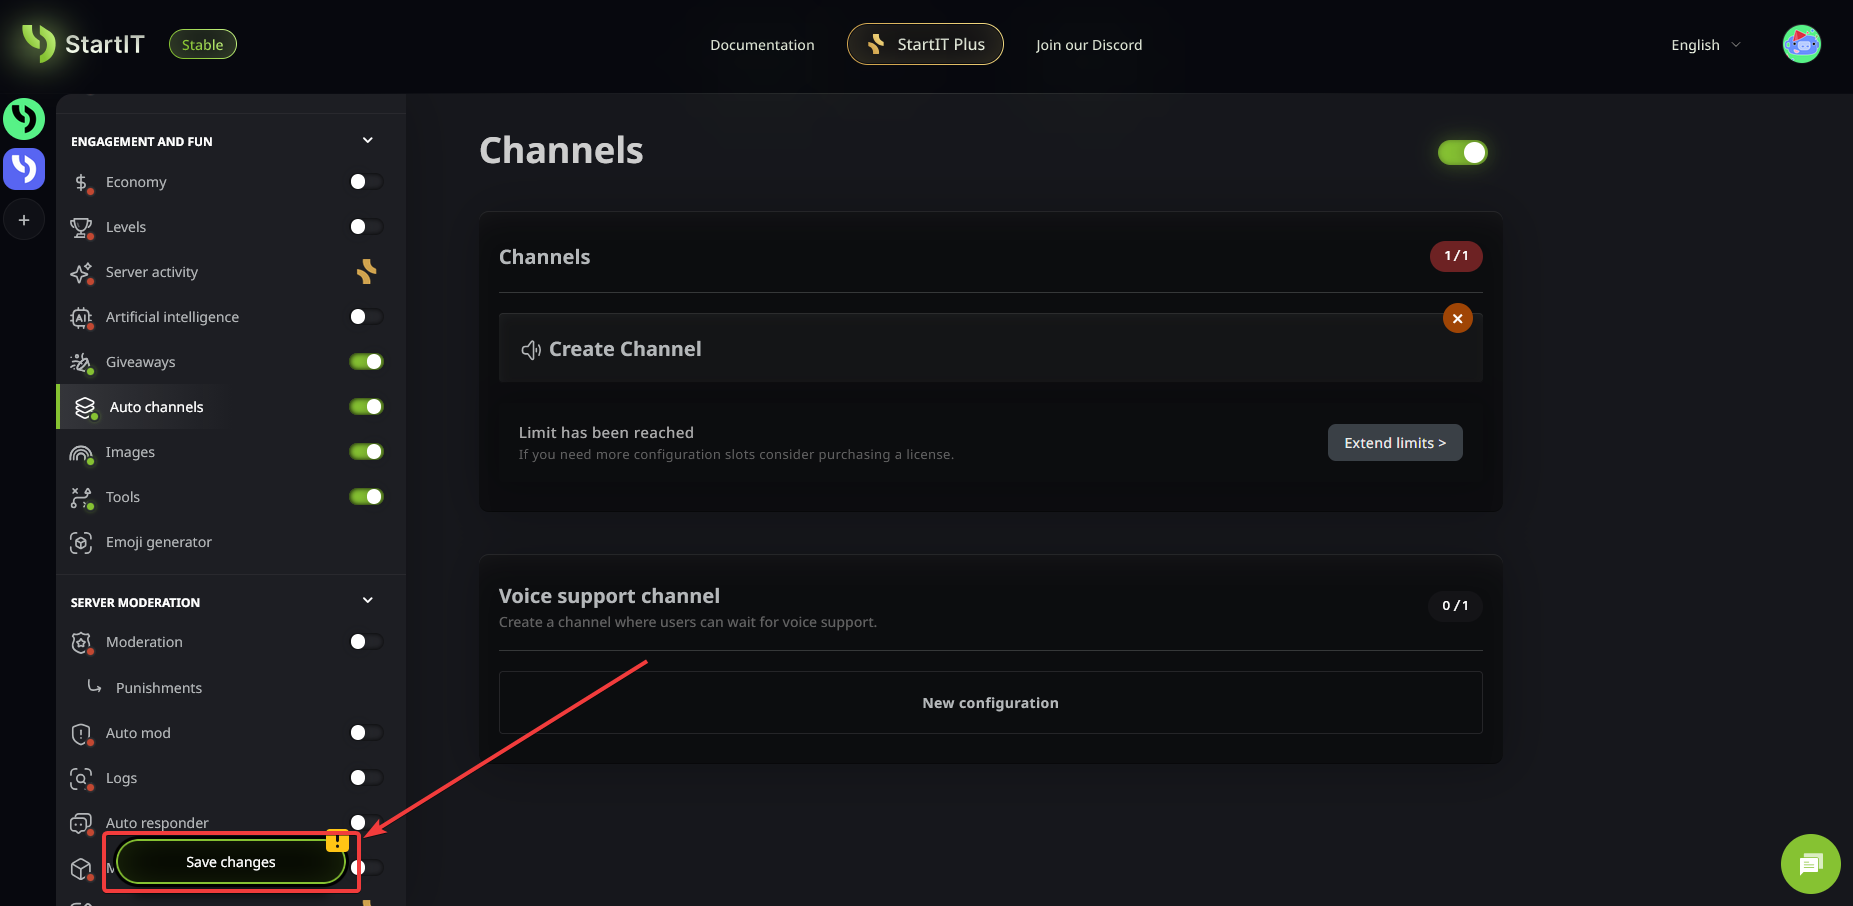
Navigate to the Auto Channels plugin, enable it, and click "New Configuration".
Configuration
Now it’s time to set up the logic behind your dynamic channels. First, select which voice channel users must join to trigger the creation of their own (1). If you are using the Economy plugin in StartIT, you can also set a cost for creating such a channel (2).
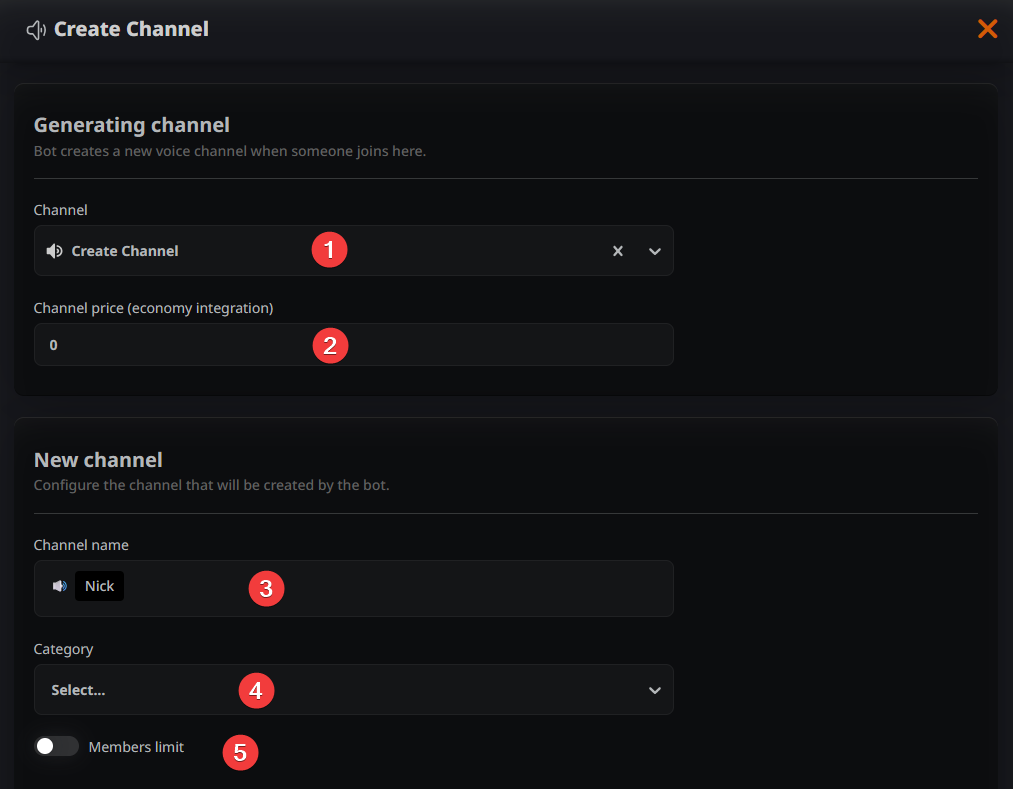
Next, you can define the default naming convention for the new channels (3), select the category where they will be generated (4), and decide if there should be a pre-set user limit for each created channel (5).
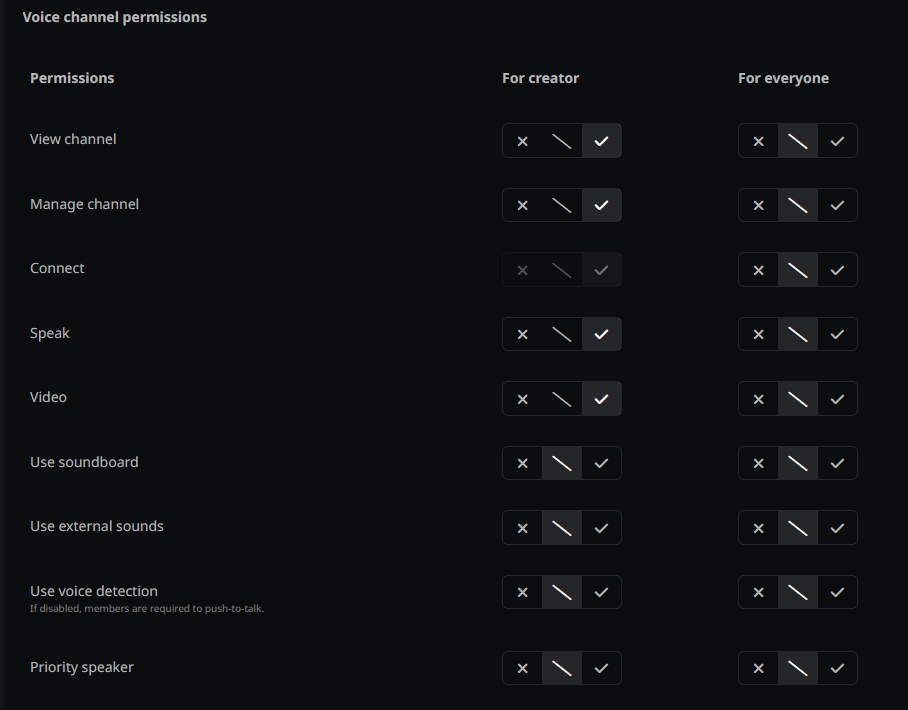
User Permissions (Optional)
You can further customize the experience by setting specific permissions for the channel creator and the members who join. Keep in mind that, by default, the plugin inherits permissions from the category where the auto channels are being created.
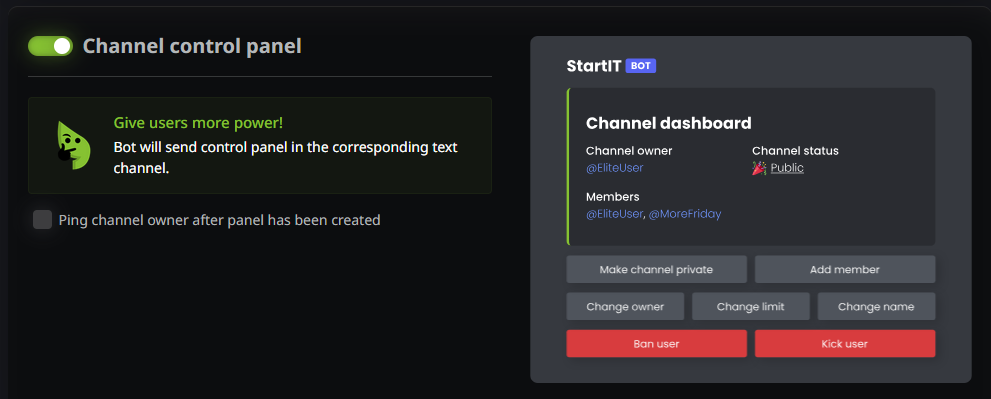
Channel Control Panel (Optional)
To give your members more freedom, you can enable the Channel Control Panel. This allows the channel creator to modify settings according to their preferences or even transfer "ownership" of the channel to another user.
Don't forget to save your changes!
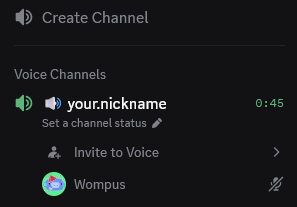
From now on, anyone who joins the designated "trigger" channel will automatically receive their own private channel and be moved to it instantly. The channel will vanish as soon as it becomes empty.
Are you ready to start create your own temporarily channel? Add StartIT bot now and make your server more organized!
Troubleshooting: Common Issues
The bot doesn't create a new channel or move users
- Ensure the Auto Channels plugin is enabled and you have saved your configuration.
- Check the bot's permissions – it must have "Manage Channels" and "Move Members" permissions enabled.
The channel is set to private, but everyone can still see and join it
- This is usually caused by the permission settings of the category where the channels are created.
- Go to the settings of the category designated for auto channels, remove all role overrides, and reset the permissions for the
@everyonerole to ensure the plugin's privacy settings can function correctly.